.png?width=200&height=80&name=4%20Color_Transparent_Horizontal_Canal%20Logo%20(1).png)
Overview
This article provides step-by-step instructions for issuing a policy cancellation in PolicyCenter. It explains how to initiate a cancellation, select the cancellation type and reason, review the cancellation effective date, and schedule the cancellation.
There are two ways to initiate a cancellation from the Policy Summary screen:
- Using the Actions Menu: Select Actions → Cancel Policy.
- Using New Transaction: Select New Transaction → Cancel Policy.
Both options lead to the same cancellation setup screen. You only need to use one of these options before proceeding with the remaining cancellation steps.
Purpose
To guide users through the policy cancellation process in PolicyCenter, ensuring the correct cancellation details are entered, the effective date is reviewed, and the cancellation is scheduled accurately.
Important Information
- All current and backdated cancellation requests must be sent to the Canal Cancellations team for processing.
- The Cancellation Effective Date automatically defaults to the Compliant Date.
- The effective date can be manually changed if required.
- If a current or backdated cancellation date is entered, PolicyCenter will prevent you from continuing. Email the request to the Cancellations team instead.
Steps to Issue a Cancellation
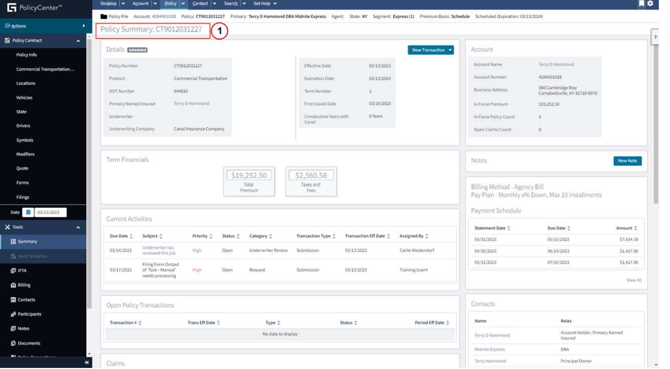
Step 1: Open the Policy Summary
Navigate to the policy you want to cancel in PolicyCenter and open the Policy Summary screen.
Step 2: Open the Actions Menu
From the Policy Summary screen, click Actions to display the available policy actions.
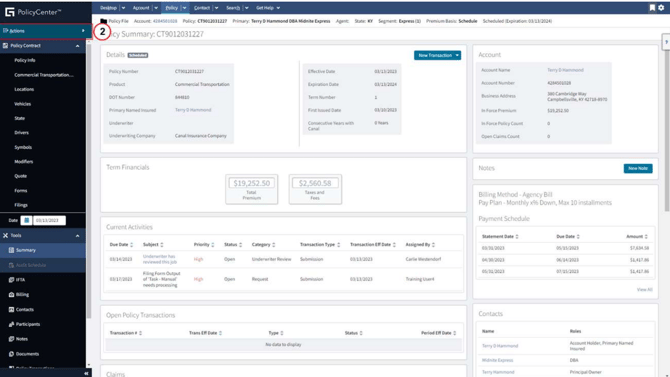
Step 3: Select Cancel Policy
From the Actions dropdown menu, select Cancel Policy to initiate the cancellation process.

Alternative option: You can also initiate a cancellation using New Transaction, as shown in Steps 4–5. If you have already selected Cancel Policy from the Actions menu, skip to Step 6.
Step 4: Open New Transaction (Alternative Option)
From the Policy Summary screen, click New Transaction to display the available transaction options.
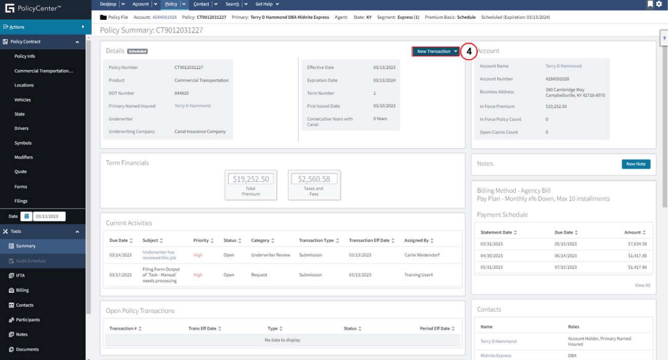
Note: This is an alternative to using the Actions menu in Steps 2–3. You do not need to complete both options.
Step 5: Select Cancel Policy
From the New Transaction dropdown menu, select Cancel Policy to initiate the cancellation process.
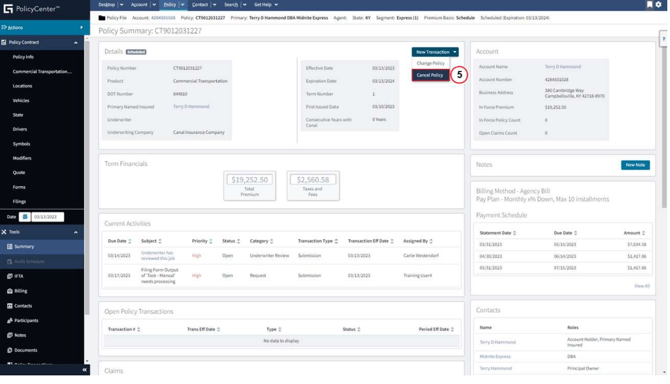
Both initiation options lead to the same cancellation setup screen. Continue with Step 6.
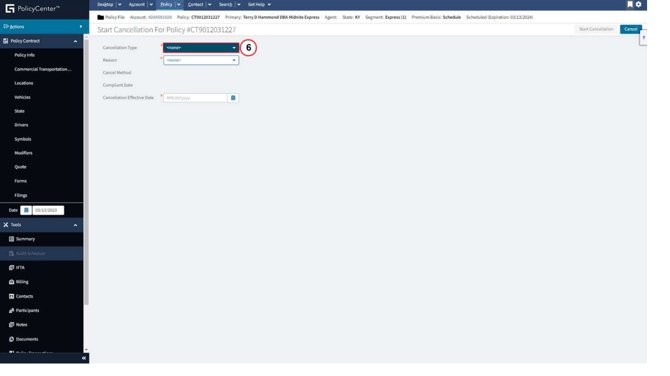
Step 6: Open the Cancellation Type Dropdown
On the cancellation setup screen, locate the Cancellation Type field and click the dropdown menu to view the available cancellation types.
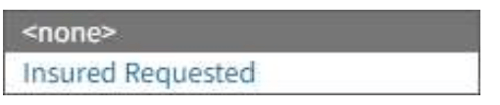
Step 7: Select the Cancellation Type
From the Cancellation Type dropdown menu, select Insured Requested.
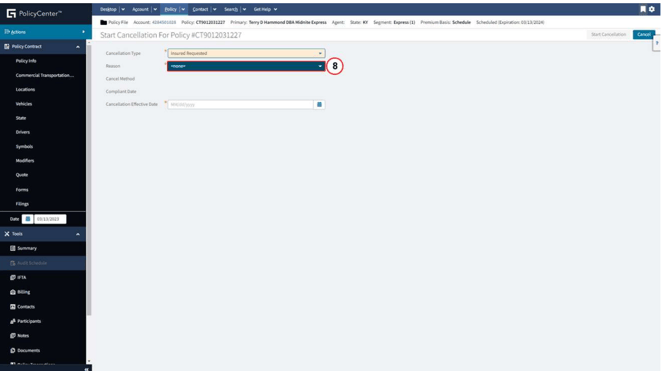
Step 8: Open the Cancellation Reason Dropdown
Locate the Reason field and click the dropdown menu to display the available cancellation reasons.
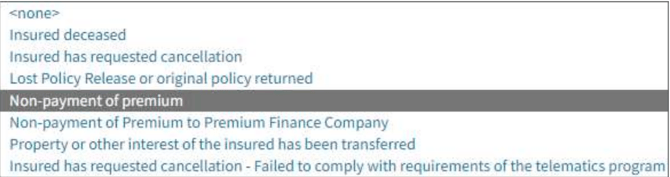
Step 9: Select the Cancellation Reason
Select the appropriate cancellation reason from the dropdown menu based on the request.
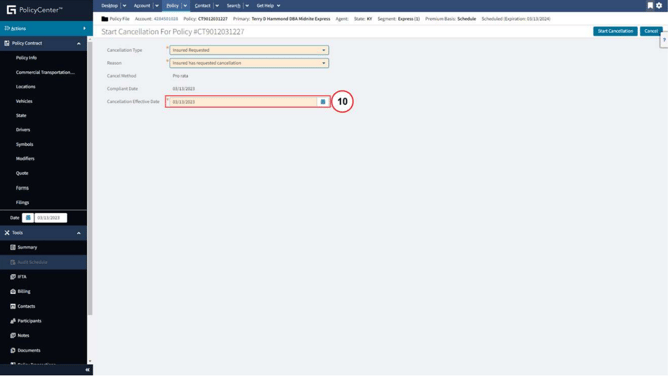
Step 10: Review the Cancellation Effective Date
Locate the Cancellation Effective Date field and review the date automatically populated by PolicyCenter.
The effective date defaults to the Compliant Date, but you can manually enter a different date if required.
Important: If you enter a current or backdated cancellation date, PolicyCenter will prevent you from continuing. All such requests must be emailed to the Canal Cancellations team for processing.
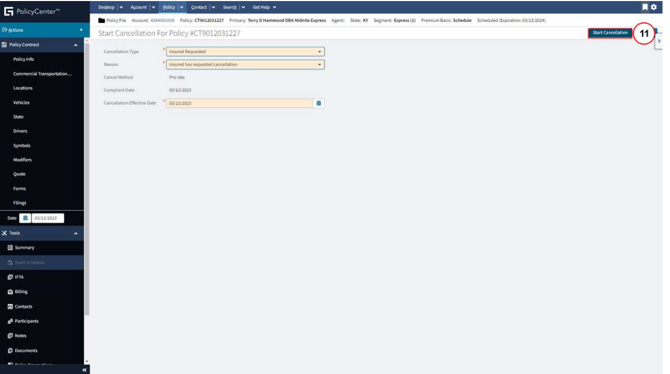
Step 11: Start the Cancellation
After reviewing the cancellation details, click Start Cancellation to proceed.
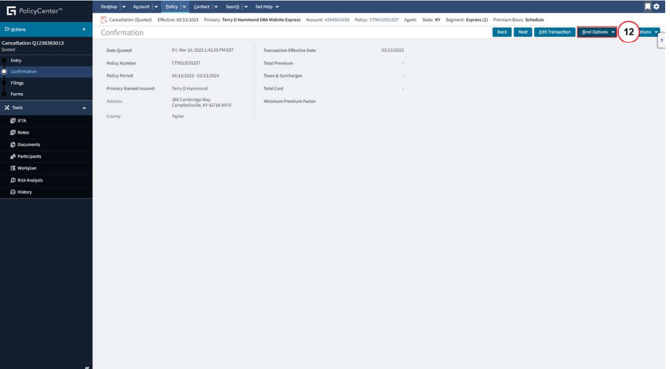
Step 12: Open Bind Options
On the cancellation transaction screen, click Bind Options to view the available options.
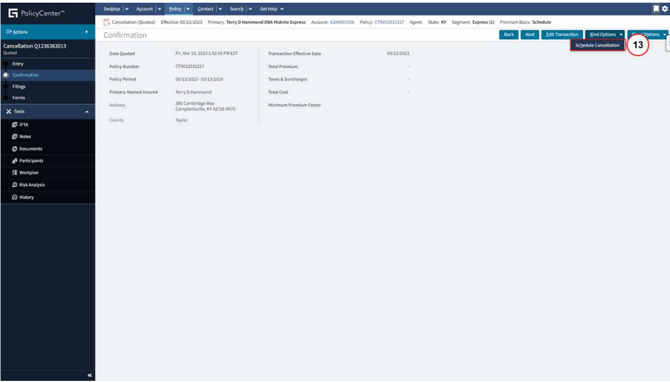
Step 13: Select Schedule Cancellation
From the Bind Options dropdown menu, select Schedule Cancellation.
Step 14: Confirm the Cancellation
Review the confirmation dialog and click OK to confirm the scheduling action.
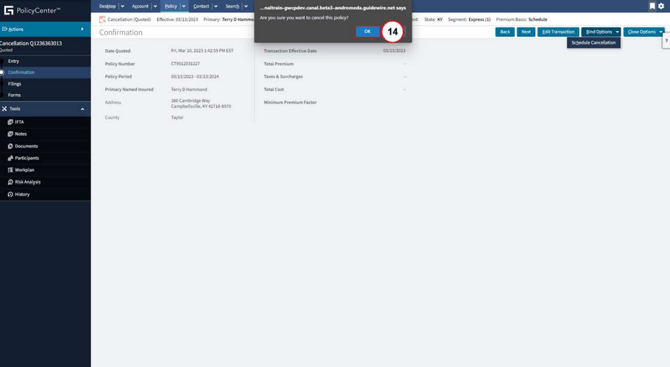
The cancellation scheduling process is now complete.